Note: Equip Mini Elly headgear for the entire quest. You can communicate with Elly during investigation. Side quests and reputation grinding are required to progress the main story at certain points.
Part 1: Rachel Investigation
Step 1 - Elly in Varmundt's Mansion
Talk to Elly in Varmundt's Mansion (ba_in01 26/266). Receive a Mini Elly headgear and equip it for the whole quest. With this headgear, you can communicate with Elly during your investigation in Rachel for Illusion power presence.
Step 2 - Masked Girl
Talk to the Masked Girl in Rachel (rachel 182/176). You and Elly uncover an argument among its citizens. More people show up and protest for Arunafeltz to be united including with the natives.
Step 3 - Female Priest
Talk to the Female Priest (rachel 183/170) who shows up to calm the people. Talk to her again. She asks you to find the origin of this conflict. Rewarded with 20 Amethyst Fragment.
Step 4 - Priest Junok at Rachel Temple
Talk to Male Priest Junok outside Rachel's Temple (ra_temple 72/54). He explains there is an ongoing conflict between natives and migrants. Guard Gala explains several attempts have been made to break into Rachel's Temple. Another Guard informs Junok that more intruders were spotted from the west.
Step 5 - Heart Hunter Intruders
Follow Junok and the Guards (ra_temple 30/142) who captured the intruders. You notice they are Heart Hunters. Gala takes them into custody and asks you to meet in Rachel's Temple for reporting. Rewarded with 30 Amethyst Fragment.
Step 6 - Guard Dent
Talk to Guard Dent (ra_temin 173/40) who explains the intrusions are getting worse.
Step 7 - Marshall Neil
Talk to Marshall Neil (ra_temin 174/38) for his stance on the situation.
Step 8 - High Priestess Niren
Talk to Freyja Priest (ra_temin 172/36) who says people come to fight rather than pray. High Priestess Niren shows up concerned about fighting in the Divine Temple. She asks to talk to you in private.
Step 9 - Secret Meeting with Niren
Talk to High Priestess Niren near the staircase (ra_temin 213/87). She knows the Heart Hunters are after Ymir's Heart piece, but security is spread too thin with the uproar between migrants and natives.
Step 10 - Marshall Neil's Son
Return to Marshall Neil (ra_temin 174/38). He says his son Maram can help.
Part 2: Finding Maram
Step 11 - Ask Villagers
Ask a Villager in Rachel (rachel 137/135) if he has seen Maram. No help. Talk to another Villager (rachel 105/134). Also no help. Talk to a third Villager (rachel 69/117) who says Maram went to a meeting just north.
Step 12 - Meet Maram
Talk to Maram (rachel 70/147). He explains Rachel's history: believers of Freyja migrated here and pushed the natives away. Maram is adopted by Niren. When his mother became High Priest, she led a program to adopt native children to bridge the gap. Instead, the native children were outcast into discrimination known as "Grey Children." Maram asks you to wait and speak with other natives.
Step 13 - Shopping List
Talk to Miriam (rachel 62/144). She and Maram give you a list of items to buy from traders in Rachel.
Step 14 - Trader Problems
Ask the trader (rachel 87/122) but he is too nervous to sell. Talk with Trader Sannat (rachel 107/102) but he does not have items in stock. Talk to Miriam (rachel 117/104) who gets frustrated at how merchants avoid "Grey Children." Talk to Maram (rachel 119/103). He has an idea to lie about your background so vendors will not get suspicious.
Step 15 - Merchant Rencia
Talk to Merchant Rencia (rachel 137/85). Maram introduces you as a merchant from an adjacent village restocking. Rencia sees your list and can provide items. He offers a delivery service since you have no cart.
Part 3: Disguises and Journey to Grey Wolf Village
Step 16 - Miriam's Worry
Talk to Miriam (rachel 120/79). She is worried the lie will unfold when Rencia makes the delivery. Maram suggests disguises from a guy he knows. He orders food at a bar and his friend will contact you there.
Step 17 - Tamarin at the Bar
Sit at the barstool (rachel 108/73) and eat the dumplings Maram ordered. Tamarin appears and introduces himself. You acquire disguises. He asks you to meet at Rachel's Square to recruit Mark and Maggi.
Step 18 - Recruit at the Square
Talk to Mark at the Square (rachel 122/120). Tamarin says go to the meeting spot.
Step 19 - Arrange Delivery
Talk to Maram (rachel 70/147). Everything is prepared to travel. He asks you to arrange delivery time with Rencia. Talk to Merchant Rencia (rachel 137/85) and tell him to drop goods at the west side of Rachel.
Step 20 - Collect Goods
Go to the wooden boxes (rachel 41/132) to collect the goods.
Step 21 - Maram Disguised
Talk to Maram disguised as a Merchant (ra_fild11 354/235). He tells you he cannot join without others getting suspicious. Maram will meet up with you later to lead you through Oz Gorge.
Step 22 - Oz Labyrinth Instance
Meet Maram at the entrance to Oz Labyrinth (ra_fild10 179/176) to begin a solo instance to cross the gorge. You cannot bring party members.
Step 23 - Cross Oz Labyrinth
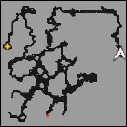
Follow the shortest path to the exit on the mini map of Oz Labyrinth Floor 1. You have to clear monsters on the way for Tamarin and the others to travel safely.
Step 24 - Through the Gorge
Talk to Maram (gw_fild01 273/339) who is glad you all made it through. He says the village is nearby and tells you to go west.
Step 25 - Village Entrance
Talk to Maram (gw_fild01 35/102) at the village entrance. Imril appears.
Step 26 - Confrontation with Imril
Talk to Imril (gw_fild01 37/105). He is extremely angry at Maram for breaking the rule of no outsiders allowed. Maram pleads that you assisted with obtaining stock and crossing Oz Gorge. Imril says Suad will have the final ruling.
Step 27 - Suad's Ruling
Talk to Maram (gw_fild01 35/102). Suad appears and Maram explains the situation: fewer traders sell to natives, Oz Labyrinth will soon be impassable from lava, and they are lucky to have an adventurer help. Maram asks Suad to give you a chance like Niren gave him. Suad allows you to enter the village.
Step 28 - Grey Wolf Village
Talk to Imril and Maram (wolfvill 143/113). They show you the distressing situation with lack of food and harsh environment. Maram suggests talking to villagers to become more trustworthy. Rewarded with 50 Amethyst Fragment. Side quests unlocked.
Important: You must complete the "Training Grey Wolves" side quest and raise your Grey Wolf Village reputation to a certain value before continuing the main story. It is recommended to complete all side quests first.
Part 4: Village Conference
Step 29 - Conference Starting
Talk to Village Boy (wolfvill 180/179). He says the conference is starting soon.
Step 30 - Suad's Conference
Meet with Suad at the conference center (wolfvill 144/151). Overhear the Radical Man (wolfvill 145/146) who states they should destroy all temples of Freyja. Listen to the Native Old Man (wolfvill 139/148) who agrees. Talk with the attendee (wolfvill 150/147) who asks for war. Listen to the Skeptical Young Man (wolfvill 152/145) who worries about the number of Rachel Guards.
Step 31 - Suad Pressured
Talk to Suad (wolfvill 144/151) as he begins the conference. He shares concerns about crossing Oz Gorge for supplies. The people start screaming and demanding war against Rachel. Suad is pressured for an armed rebellion. One villager mentions getting weapons from a hidden location. This catches Maram's attention.
Step 32 - Investigate the Weapons
Talk to Miriam (wolfvill 148/153). She agrees you and Maram should find the source of weapons. Maram suggests pretending to be part of the armed rebellion. Rewarded with 40 Amethyst Fragment.
Step 33 - Radical Man's Source
Lie to the Radical Man (wolfvill 143/145). He discloses that he got weapons from Bearded Jack in Rachel.
Part 5: Weapons Investigation
Step 34 - Bearded Jack
Travel to Rachel. You arrive at a Hardware Store. Talk to Bearded Jack (rachel 75/44) and ask for "Smelly Dandelion." Jack tells you to meet someone at Veins for weapons.
Step 35 - Dandelion in Veins
Talk to Dandelion (veins 293/282) and mention "Smelly Dandelion." He gets upset at Jack for the bad password. Maram asks for the supplier. Dandelion says he acquires them at a secret base in Thor's Volcano.
Step 36 - Thor's Volcano
Talk to Maram (thor_v01 169/169) in the middle of Thor's Volcano Floor 1. He found a way into the secret base.
Step 37 - Secret Base Instance
Talk to Maram (que_thr 133/53) at the entrance. You enter the base as an instance (not forced solo). Follow the path through the base. Maram will help unblock barricades. Be careful of alarm crystals that spawn guards. Collect all 5 Document Files at the end.
Step 38 - Miriam's Discovery
Talk to Miriam (1@tcamp 34/100) who found the base too. The weapons are very old. She mentions this is a military base once managed by her step father, Priest Amal. However, the documents suggest a different corruption with weapons being sold.
Step 39 - Return with Evidence
Talk to Maram (1@tcamp 32/102) who is worried about the corruption. Miriam says she will go back to Rachel to show the evidence. Rewarded with 50 Amethyst Fragment.
Step 40 - Warn the Village
Talk to Suad (wolfvill 140/122). Elly's analysis shows the old weapons have an accuracy of 9.72%. Miriam and Maram warn the village.
Step 41 - Weapon Box
Go to the weapon box (wolfvill 131/257). Miriam warns villagers about the dangerous weapons and asks Suad to act.
Step 42 - Armed Villager
Talk to the armed villager (wolfvill 131/252). They are ready for rebellion. Suad pushes on and says he will meet you at Rachel to invade the temple. He asks Maram to stay in Grey Wolf Village for emergencies. Rewarded with 30 Amethyst Fragment.
Part 6: The Rebellion at Rachel Temple
Step 43 - Story Instance
Talk to the Ordinary Person in Rachel (rachel 169/245) to enter a story instance (not forced solo).
Step 44 - The Protest
Follow Miriam to the location of the protest. You see the armed rebellion against the Rachel Guards. Miriam quickly disappears to go inside the temple.
Step 45 - Inside the Temple
Follow navigation to inside the temple. Miriam says you need to stay quiet. The instance has a similar layout to Sanctuary Purification.
Step 46 - Schulang and Bagot
Clear all rooms. You and Miriam find Schulang and Illusionist Bagot discussing their plan of using Illusion power in Rachel. Both leave quickly.
Step 47 - Rebellion Casualties
Follow Miriam out. The rebellion has reached the temple entrance. They start shooting but the faulty weapons cause many casualties. Stop the rebellion and exit the instance. Repeatable instance Sanctuary Purification unlocked.
Part 7: The Aftermath and Villa of Deception
Step 48 - Niren's Council
Talk to High Priestess Niren (rachel 116/200). She, High Priest Zhed, Miriam, and Suad realize the severity of the situation. Suad worries about news reaching Grey Wolf Village but Niren and Zhed will handle public relations. Niren asks if Miriam is sure her adoptive father High Priest Amal was involved. Miriam says he suddenly became motivated for unknown reasons. Elly notices the timeline matches when Heart Hunters escaped Varmundt's Mansion. Niren concludes the two groups are collaborating. Rewarded with 60 Amethyst Fragment.
Step 49 - The Villa
Go to the Villa location (oz_dun01 223/116). Find Maram, Miriam and Ira. They say this is where Amal conducts his work. Maram returns to Grey Wolf Village and tells you Ayra will lead the way.
Step 50 - Villa Story Instance
Talk to Ayra (oz_dun01 219/117) to enter a story instance (not forced solo). Talk with Miriam and all NPCs inside. Clear all Heart Hunters to proceed into the next area.
Step 51 - Schulang
Find Schulang who tries to stop you from entering the final chamber. Defeat him to proceed.
Step 52 - Amal and Fake Freyja
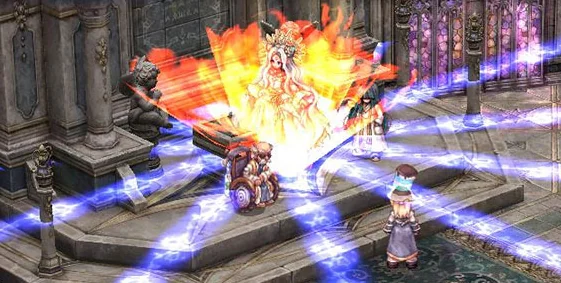
Meet High Priest Amal and Illusionist Bagot. They say you are too late and they are recreating Goddess Freyja with the power of Illusion.
Step 53 - Defeat Fake Goddess Freyja
Defeat Fake Goddess Freyja. The embryo falls out of it.
Step 54 - Confrontation with Amal
Talk to Miriam. Amal is angry at you for destroying his work. Miriam tells her father you are only here to help. The goddess he tried to make can never come close to the real Goddess Freyja. Exit through the south portal.
Step 55 - Report to Maram
Talk to Maram (oz_dun01 225/119) and explain the situation. He tells you Amal and Miriam went to the temple.
Step 56 - Final Meeting
Unequip Mini Elly and meet with Miriam, Niren, Zhed, Suad and Maram (ra_temin 254/117). They are horrified about how Ymir's heart-piece was stolen and used for this purpose.
Step 57 - Resolution
Talk to Elly (ra_temin 258/117). She explains the samples from the villa are the same molecules used for homunculus embryos. Bagot is born from an embryo based on the Pope's appearance, and later became a chimera with Illusion power. Elly suggests integrating indigenous and migrants by giving natives legal status and power. Niren agrees. You ask where Bagot is heading with Ymir's heart-piece. Miriam says her father and Bagot are going to the northern continent where Jormungandr is sealed. Bagot is interested in resurrecting other deities. Rewarded with 180 Amethyst Fragment and Costume Mini Elly.
Main Quest Total Rewards
510+ Amethyst Fragments across all steps. Costume Mini Elly headgear. Access to Sanctuary Purification and Villa of Deception instances. Grey Wolf Village hub with shops, equipment exchange, and enchanting. 10+ daily quests. Story continues to Episode 19.
Side Quest: Investigation of Oz Labyrinth
Step 1
Talk to Imril (wolfvill 143/113).
Step 2
Go to Oz Labyrinth Fl 1 and investigate the crack in floor (oz_dun01 27/184). Find a box someone left behind (oz_dun01 68/284). Investigate another crack (oz_dun01 65/189). Investigate another crack (oz_dun01 111/96).
Step 3
Talk to Villager Paul (oz_dun01 100/92) who is struggling to cross. Kill 10 monsters in oz_dun01 and return to Paul.
Step 4
Find another box (oz_dun01 134/56). Investigate another crack (oz_dun01 110/37). Investigate crack on Floor 2 (oz_dun02 152/276). Talk to Elderly Man (oz_dun02 143/231).
Step 5
Return to Imril in Grey Wolf Village (wolfvill 143/113). Rewarded with 20 Amethyst Fragment and daily quest unlocked.
Side Quest: Training Grey Wolves
Step 1
Talk to the Farmer (wolfvill 117/119). Talk to Aisha (wolfvill 99/178). Give 1 Meat to the Baby Grey Wolf (wolfvill 100/177). Rewarded with 10 Amethyst Fragment.
Step 2
Talk to the Farmer (wolfvill 117/119). He accepts you as part of Grey Wolf Village. You may now attend the conference with Suad. Rewarded with 10 Amethyst Fragment, daily quest unlocked, and main story quest continuation.
Side Quest: Ahab's Request
Step 1
Talk to Zlan (wolfvill 85/111), Kayar (wolfvill 83/109), and Desel (wolfvill 87/109). Talk to Ahab (wolfvill 127/155) who asks you to get cucumber sauce from Rachel.
Step 2
Talk to Shop Keeper (rachel 135/64) and choose 3rd option for cucumber sauce. Give Ahab his sauce (wolfvill 127/155). Talk to Ahab again after he finishes eating. Return to Zlan (wolfvill 85/111). Rewarded with 20 Amethyst Fragment and daily quest unlocked.
Side Quest: Collecting Folklore
Step 1
Talk to Folklorist Gudra (wolfvill 61/170) who gives you a Recording Note. Record folklore from Dina (wolfvill 106/224), Amira (wolfvill 180/204), and Shanina (wolfvill 154/184). Return to Gudra. Rewarded with 20 Amethyst Fragment and daily quest unlocked.
Side Quest: Purifying Water
Step 1
Talk to Budan (wolfvill 103/230) who asks for water purifiers from Rachel. Talk to Trader (rachel 103/141) and buy a Water Filter. Put the filter into the water barrel (wolfvill 104/234) to receive Purified Water. Give Budan the purified water (wolfvill 103/230). Rewarded with 20 Amethyst Fragment and daily quest unlocked.
Side Quest: Transporting Goods
Step 1
Talk to Hazar (wolfvill 50/234) who has a broken wagon. Take 1 Tough Vine and try to fix the wagon (wolfvill 53/234). The chance is random and you only need 1 Tough Vine.
Step 2
Hazar asks you to find Camille and help him travel safely. Click on Camille's wagon (gw_fild01 115/130). Find Camille being attacked by a Grey Wolf (gw_fild01 205/102). Play an RPG-like text battle, choose 1st Option until the Grey Wolf dies. Talk to Camille (gw_fild01 201/102).
Step 3
Talk to Hazar (wolfvill 75/214). He says 4 goods were lost in Grey Wolf Forest. Find items at: gw_fild01 89/211, gw_fild01 230/52, gw_fild01 347/194, gw_fild01 242/325. Return to Hazar. Rewarded with 20 Amethyst Fragment and daily quest unlocked.
Side Quest: Clinic Construction
Step 1
Talk to Ezekiel (wolfvill 171/253). Talk to Old Man (wolfvill 176/111). Return to Ezekiel who requests 3 Steel. Give Ezekiel the steel. Talk to Ezekiel a final time. Rewarded with 20 Amethyst Fragment and daily quest unlocked.
Side Quest: Checking Traps for Food
Step 1
Talk to Eruin (wolfvill 202/166). Inspect the traps in trees of Grey Wolf Forest (gw_fild01, marked on minimap). You may acquire Trapped Bird, Trapped Lizard, or Trapped Pear. You need 5 total food sources (e.g. 2 lizards, 1 bird, 2 pears). Bring Eruin the food. Rewarded with 20 Amethyst Fragment and daily quest unlocked.
Side Quest: Clearing Firewind Kites
Step 1
Talk to Ahir (wolfvill 147/97) who is scared of Firewind Kites bringing fire over the village. Kill 30 Firewind Kites in gw_fild02. Return to Ahir. Rewarded with 20 Amethyst Fragment and daily quest unlocked.
Side Quest: Childhood Friends
Step 1
Talk to Alber (wolfvill 182/82). He asks you to check on his childhood friend Horim who works in Rachel Hotel. Talk to Horim (ra_in01 388/59). He wants to meet after work west of Rachel.
Step 2
Escort Horim to Grey Wolf Village through multiple waypoints: ra_fild11 358/229, ra_fild10 375/293, oz_dun01 285/170, gw_fild01 272/342, gw_fild01 36/99, wolfvill 266/26. He is grateful for the safe escort. Rewarded with 20 Amethyst Fragment and daily quest unlocked.
Side Quest: Helping the Children
Step 1
Talk to Young Man (rachel 38/44), Man (rachel 37/42), Young Boy (rachel 40/45), and Young Girl (rachel 36/45). Rewarded with 10 Amethyst Fragment.
Side Quest: Price of Labor
Step 1
Talk to Old Man (rachel 181/51). Talk to the Trader (rachel 136/95) who tells you he dreamed of being an adventurer until he took an arrow to the knee. Return to the Old Man. Rewarded with 10 Amethyst Fragment.
Side Quest: Gather Opinions in Rachel
Step 1
Talk to the High Priest (rachel 155/236). He asks you to talk to 6 citizens in Rachel marked on your minimap. After talking to all 6 randomized NPCs, return to the High Priest. Rewarded with 3 Amethyst Fragment and daily quest unlocked.
Side Quest: Picking Half Flowers
Step 1
Talk to the Kid (rachel 180/80) who is interested in Half Flowers. Talk to the Kid again (rachel 70/135) who explains the picking technique. Pick the Half Flower near the tree (rachel 72/133) using: 20 degrees Angle / 4 Leaves Left / 30ml of Water / 6g Secret Powder. Rewarded with 10 Amethyst Fragment and daily quest unlocked.
Reputation, Equipment & Enchantment
Reputation
The reputation NPC for Grey Wolf Village is located at wolfvill 167/135. Each level requires 1,000 points obtained via daily quests. Higher reputation unlocks more rewards.
Equipment Exchange
Talk to NPC Emmett (wolfvill 164/137), Option 1. Exchange Amethyst Fragments for Grey Wolf equipment: Suit, Robe, Manteau, Muffler, Boots, Shoes, Pendant, Ring, Earring, Necklace (all with 1 slot).
Enchantment
Talk to NPC Emmett (wolfvill 164/137), Option 2. A new enchanting system for Grey Wolf Equipment was introduced in Episode 18.
Daily Quests Unlocked
Investigation of Oz Labyrinth, Training Grey Wolves, Ahab's Request, Collecting Folklore, Purifying Water, Transporting Goods, Clinic Construction, Checking Traps for Food, Clearing Firewind Kites, Childhood Friends, Gather Opinions in Rachel, Picking Half Flowers. All require level 170 and reset at 4:00 AM Korean Time.
Instances Unlocked
Sanctuary Purification (repeatable, from Main Step 47). Villa of Deception Normal (repeatable). Villa of Deception Advanced (requires Normal completion). Drops: Pontifex Courage, Pontifex Wisdom, Pontifex Tenacity, Pontifex Belief, Adulter and Vivatus Fides Weapons.